


If you want your website to rank on the first page of Google, Google Search Console (GSC) is your most important tool. It’s a free service that helps you monitor, maintain, and troubleshoot your site’s presence in Google Search results.
But before you can see any data, you must prove to Google that you actually own the site. This process is called Website Verification.
In this guide, we’ll walk you through every single method to verify your site, from the easiest to the most technical.
Why Should You Verify Your Site?
Verification gives you access to “top-secret” data about your site, including:
- Which keywords people use to find you.
- Which pages are indexed (and which are broken).
- Core Web Vitals and mobile usability reports.
- The ability to submit sitemaps directly to Google.
Getting Started: Adding a Property
- Go to Google Search Console.
- Click the “Add Property” button from the dropdown menu on the top left.
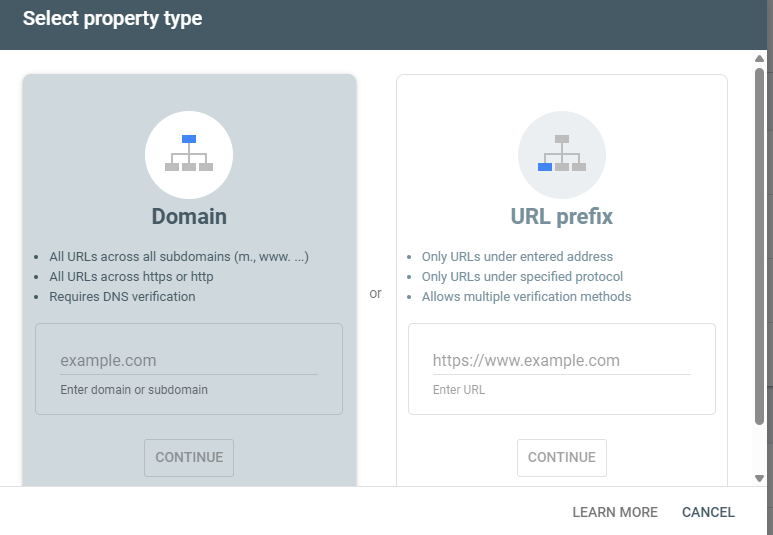
- You will see two options: Domain or URL Prefix.
Pro Tip: Use Domain if you want to track everything (m., www., and non-www). Use URL Prefix if you only want to track a specific version of your site.
Method 1: HTML File Upload (Recommended for URL Prefix)
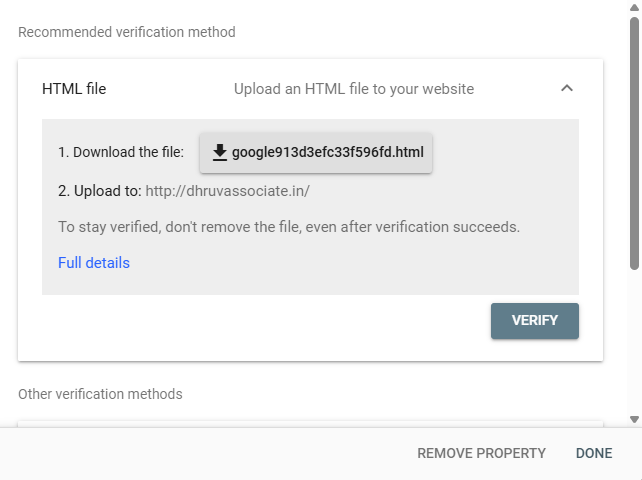
This is a classic method where you upload a small file to your website’s “root” folder.
- Select URL Prefix and enter your website URL.
- Under “Other verification methods,” select HTML file.
- Download the file provided (it looks like
google12345.html). - Log into your hosting (Cpanel) or use FTP and upload this file to the public_html folder.
- Go back to GSC and click Verify.
Method 2: HTML Tag (Easiest for WordPress/Blogger)
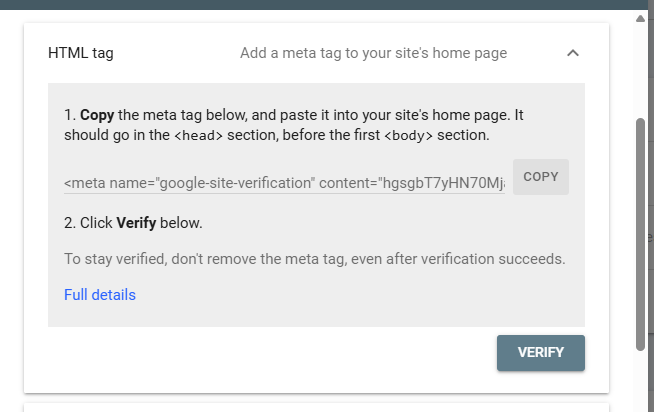
If you can’t access your server files but can edit your website’s code (or use a plugin), this is for you.
- Choose the HTML Tag option.
- Copy the meta tag code (e.g.,
<meta name="google-site-verification" content="..." />). - Paste this code into the
<head>section of your website’s homepage. - If you use WordPress, you can simply paste the “content” ID into the settings of plugins like Rank Math or Yoast SEO.
- Click Verify.
Method 3: DNS Record (Best for Domain Properties)
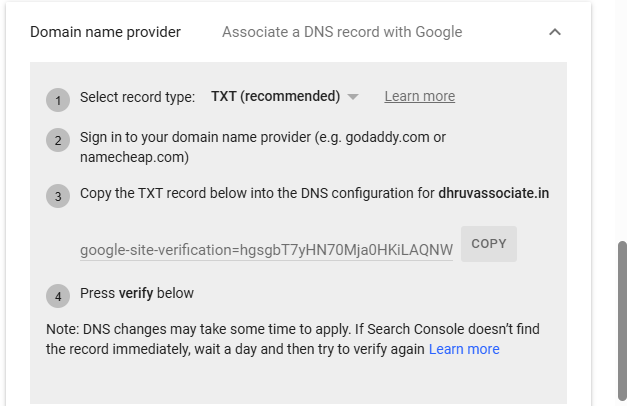
This is the most powerful method because it covers all subdomains. It requires access to your domain registrar (GoDaddy, Namecheap, Cloudflare, etc.).
- Select the Domain property type.
- Google will give you a TXT record. Copy it.
- Sign in to your domain provider and find the DNS Management section.
- Add a new TXT Record:
- Host/Name:
@ - Value: Paste the Google verification string.
- Host/Name:
- Save and wait (it can take 10 minutes to a few hours). Click Verify.
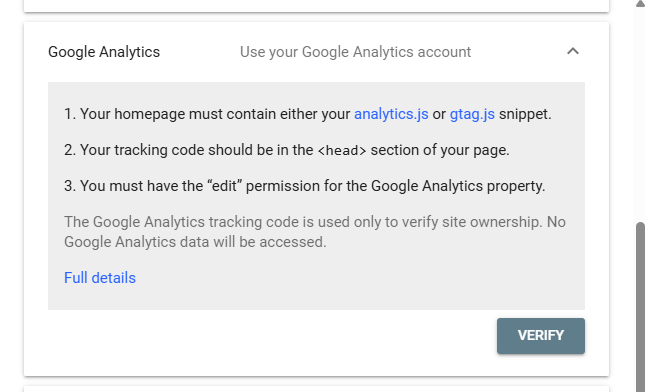
Method 4: Google Analytics (Instant Verification)
If you already have Google Analytics 4 (GA4) installed on your site, this is a one-click process!
- Ensure you are logged into the same Google account for both GA4 and Search Console.
- Select the Google Analytics method.
- Click Verify.
- Requirement: Your GA4 tracking code must be in the
<head>of your page.
Method 5: Google Tag Manager
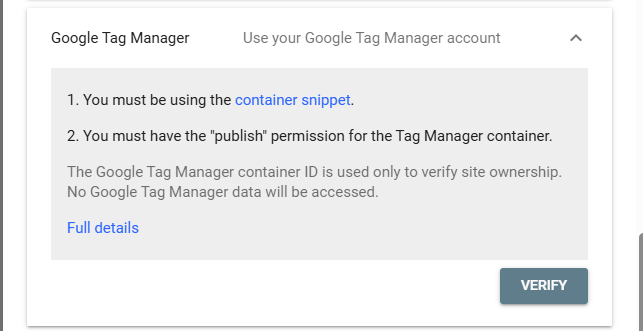
Similar to Analytics, if you use Google Tag Manager (GTM), you can verify instantly.
- Ensure you have “Publish” permissions in your GTM container.
- Select the Google Tag Manager method.
- Click Verify.
Common Verification Errors & How to Fix Them
- Tag not found: Ensure the code is inside the
<head>section, not the<body>. - DNS changes not reflected: DNS can take up to 48 hours to propagate. Be patient!
- Connection Timeout: Your server might be blocking Google’s bot. Check your firewall settings.
Conclusion
Verifying your website is the first step toward SEO success. For most users, the HTML Tag or Google Analytics method is the fastest. However, if you want the most accurate data across all subdomains, go with the DNS Record.